How to integrate Chatfuel and Google Sheets using IFTTT
So you have discovered Chatfuel and are making a Facebook bot. How awesome right?! And you’ve seen that it can integrate with Google Sheets. Amazing!
Except now you can’t find any instructions on how to easily get data from Chatfuel into Google Sheets without using Zapier. Boo!
We’ve written a step-by-step on how to use IFTTT and Chatfuel to get your customer data, signups or email addresses into a spreadsheet.
I think Zapier is great but much like our clients I like to spend less on multiple SAAS tools and get more value from our budgets. With this in mind I have put together an instructional on how to integrate Chatfuel with Google Sheet using IFTTT.
Instructions for Chatfuel and Google Sheet using IFTTT
We’re going to do this in 4 parts.
- IFTT Maker
- Chatfuel Setup
- IFTTT Applet Setup
- Sheets Setup
IFTTT Maker Setup
- Create an account with If This Then That
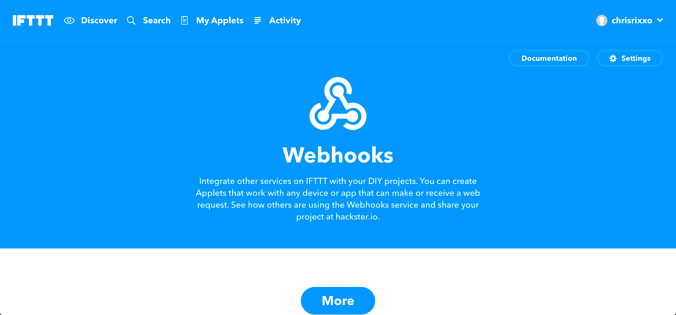
- Create a maker account. Visit the maker page and click Connect. If you’re already connected as a maker you can skip this step.
- Click on settings in the top right-hand corner of this page once connected.

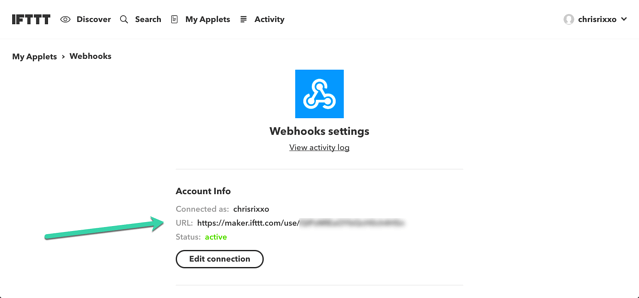
4. Copy and paste the URL shown for your account into the browser bar of a new tab.

5. Copy the URL where is says “Make a POST or GET web request to:”
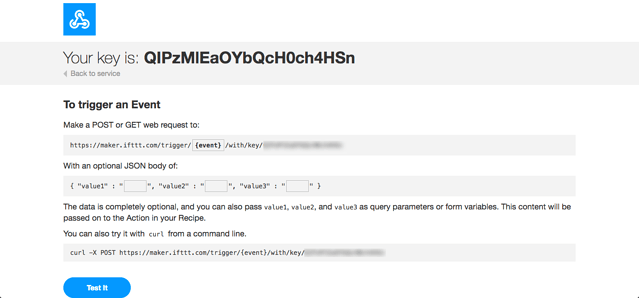

6. We’ll change the bit that says {event} in the next step.
Chatfuel Setup
We’re going to assume you know how to use Chatfuel and have setup your bot to collect the data you need.
We have setup 6 Chatfuel Attributes for this example How to integrate Chatfuel and Google Sheets using IFTTT .
(By default IFTT will only handle 3 custom attributes, so we’ll show a trick to deal with this in the sheets section.)
- Add the JSON Card inside your block, or in a new block depending on where and how you are going to fire it.
- Change the API Type to Post
- In the URL paste URL from the IFTT Maker setup
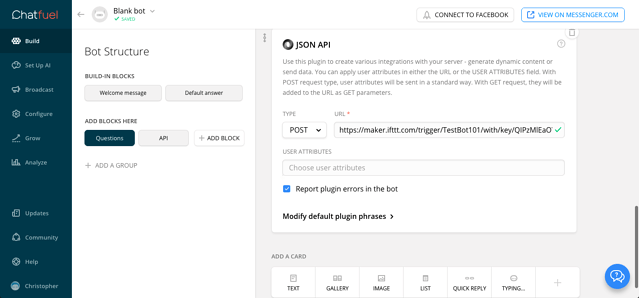

- We need to give an event name and replace {event} in the URL. For ease call it something simple, and unique with no spaces. We’ll use TestBot101
- To send the attributes we need to add them to the end of this url. (we recommend not trying to do this within the Chatfuel box!)
The format for this is:
?value1=&value2=&value3=
Because IFTT will only accept 3 value inputs we need to put more than one variable in the values. You can add more than one attribute to the value and separate them with a semi-colon like this. We like to keep the two most important bits of information in their own variable and combine in Value 3.
?value1=&value2=&value3=;;
- So to send the variables we have for our bot we will add
?value1=How to integrate Chatfuel and Google Sheets using IFTTT&value2=&value3=;;; to the end of the URL - That’s it for now here. Go to the next step.
IFTT Applet Setup
- Go to IFTTT and My Applets
- Start a new applet.
- For the first part (+this) search and choose Webhooks (ss)
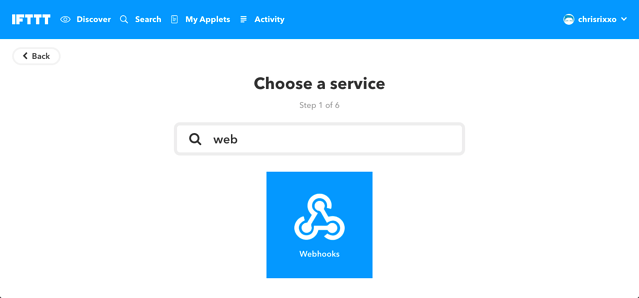

4. Choose the Trigger of “Receive a web request”
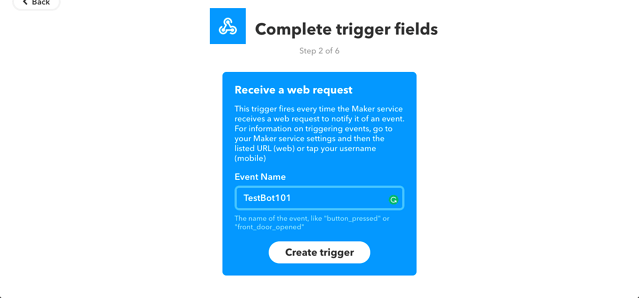

- Enter the event names we set earlier in the Chatfuel setup “TestBot101″
- Next we’ll set up the “that” search and choose Google Sheets and connect your Drive with your Google login.
- We’re going to choose to “Add row to spreadsheet”
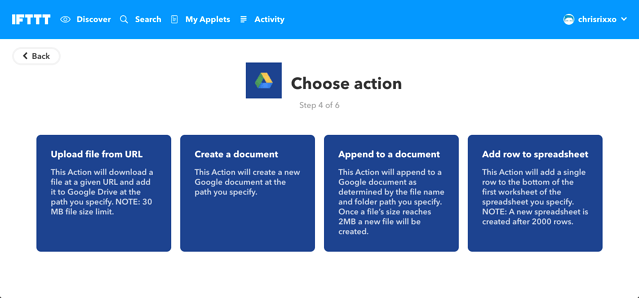

- Now on this stage if you aren’t fussy about file name or locations just click “Create action”. You can also make changes to filename and path if you choose. I’m going to call our Sheet TestBot101 Data
- Click create action
- Then click Finish
Testing your Chatfuel and Google Sheets using IFTTT integration
- Head on back over to Chatfuel and test your Chatbot
- If it was successful you’ll see the Sheet has appeared in your Drive
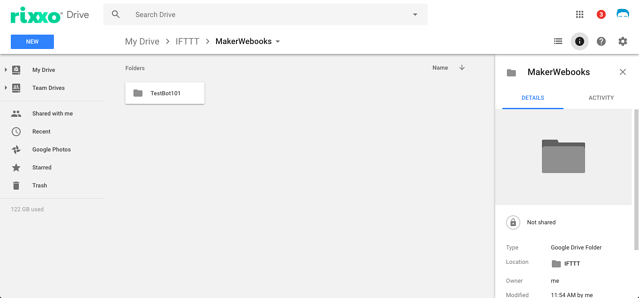

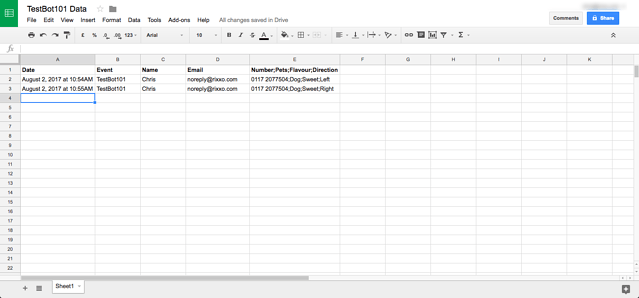
- Add a row at the top and give some titles. Remember the third value is combined. The Sheets Setup step next shows you a formula to separate them.

Sheets Setup
If you have more than 3 data sets you will have them combined in the third value column. To quickly and easily seperate these you can try this formula:
=TRIM(MID(SUBSTITUTE($E2,”;”,REPT(” “,999)),COLUMNS($E:E)*999-998,999))
Paste the formula into F2 then drag the corner along for as many cells as you have data sets in E2. In our case it is 4.
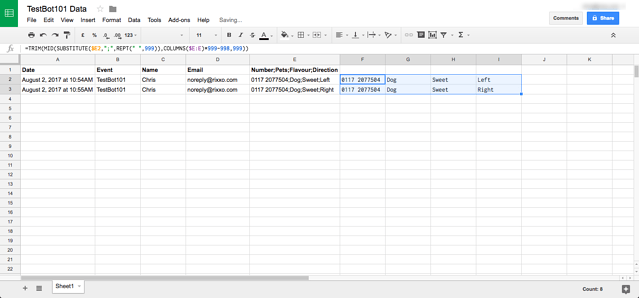

You can add titles and tidy up as you choose.
So that’s about it. You can tell we love AI and chatbots can’t you, especially if you’ve seen our other post. If you’ve noticed changes or have any questions please feel free to comment and support each other also. We’d love to hearif you have any other cool methods of doing this also!
